
Introduction
Wikipedia defines multitenancy as “… a principle in software architecture where a single instance of the software runs on a server, serving multiple client organizations (tenants)…. With a multitenant architecture, a software application is designed to virtually partition its data and configuration, and each client organization works with a customized virtual application instance.” To demonstrate this principle we’re going to create a simple web application that presents custom websites for a pair of clients based on the client subdomain.
For this walkthrough we’re going to be using the following tools and technologies:
- Visual Studio 2012
- SQL Server 2008
- .NET Framework 4
- LINQ to SQL
- C#
- HTML 5
- CSS 3
The implementation of multitenancy presented here has been adapted from the article Running multiple websites in a single hosted space by Bipin Joshi. If you’re looking for a multitenancy implementation using ASP.NET Web Forms with the Entity Framework then I’d suggest you take a look at his article – it really is very good.
All of the source code for this walkthrough is available for download here.
The System Architecture
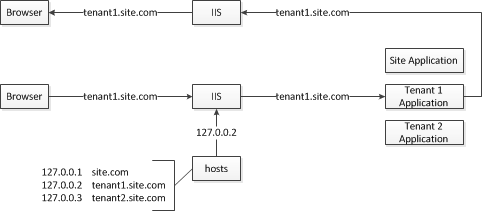
Generally speaking, the steps that lead from a user entering a website address in his browser to viewing the content are fairly straightforward. The browser sends a request for the content at that address to a server. The server receives the request, matches the address with an application, and passes the request on to that application for processing. The application reads the request, creates a response, and passes the response back to the server. The server returns the response to the browser and the browser presents the response content to the user. This is sometimes referred to as a single tenant application architecture. Each client application is matched with a single IP address and host name so that, as requests come in, the server can route them to the appropriate application (Figure 1).
In situations where multiple clients need the same core capabilities with minor differences, such as displaying websites with a similar structure and layout but different styling and content, then the single tenant approach becomes problematic. Code that is essentially the same needs to be duplicated for each client and updates and bug fixes need to be published to each client separately. Keeping track of multiple instances of the same application almost always leads to a maintenance nightmare of missed updates, longer deployment times, and wasted server resources. Solving these kinds of problems is what a multitenant architecture is for.
In a multitenant architecture the steps leading from the request to the response are slightly different. The browser sends the request to the server. But this time, instead of the server matching the requested address with the client application instance, the server routes the request to a single instance of the application. The application reads the request to determine which client the response is for and generates the appropriate response before passing it back to the server. The rest of the work flow proceeds as normal. The server returns the response and the browser presents the response content (Figure 2).

Looking at Figures 1 and 2 the difference between the single and multi-tenant architectures should be pretty obvious. We’ve told the server that all the client website addresses should point to the same instance of the application and made deciding which content to present part of application processing. Essentially, we’ve shifted the task of routing a request from the server to the application. By taking this approach any updates or bug fixes that get published are immediately available to all the clients and the server resources consumed by multiple application instances have been reclaimed making the whole system more efficient and easier to maintain.
Getting Started
Before we begin we need to update the hosts file used by the web server so that all the requests for our clients are sent to the single instance of the application and then we’re going to create the application project and set its configuration properties.
Updating the Hosts File
Before we can handle requests for client sites we need to tell the web server how to route those requests to the application. For hosting applications on an instance of IIS running on a local machine, the default IP address for the host localhost is usually 127.0.0.1. For our purposes we’re going to rename the host at 127.0.0.1 site.com. This is where the application will be located. Next, we’ll add entries for tenant1.site.com and tenant2.site.com both with IP addresses pointing to 127.0.0.1. This tells IIS that requests for site.com, tenant1.site.com, and tenant2.site.com should be resolve to the application hosted at 127.0.0.1. This is how the shift in routing moves from IIS to the application.
To update the hosts file:
- Open a text editor in administrator mode and open the hosts file at C:\Windows\System32\drivers\etc\hosts. The contents of the file should be similar to Figure 3.
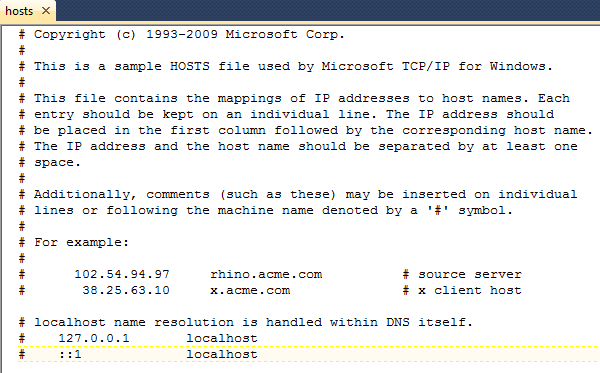
- At the bottom of the file, add the lines shown in Listing 1.
127.0.0.1    site.com
127.0.0.1    tenant1.site.com
127.0.0.1    tenant2.site.com
Listing 1: The updated IIS host file entries.
- Save the hosts file and close the text editor.
Creating the Project and Configuring the Project Properties
Before we can start building the application we need to create the project in Visual Studio and make some changes to its configuration such that it will work with the updates we’ve made to the hosts file.
To create the Visual Studio project:
- Open Visual Studio in administrator mode and select File → New → Project from the menu.
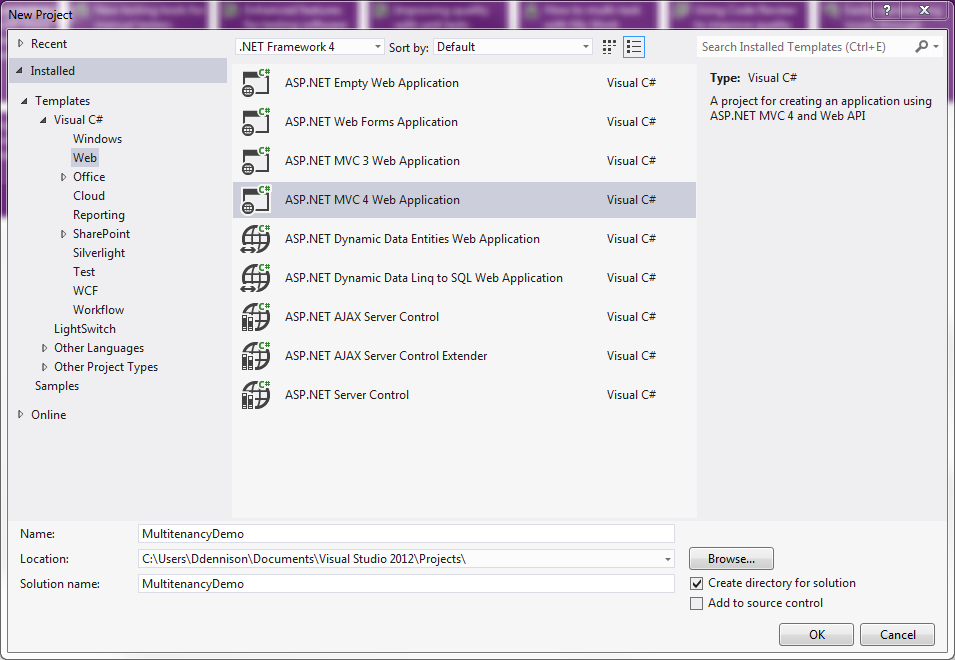
- In the New Project dialog select the Web menu option and select the ASP.NET MVC 4 Web Application template.
- Name the application MultitenancyDemo, specify where the application should live, and click OK (Figure 4).
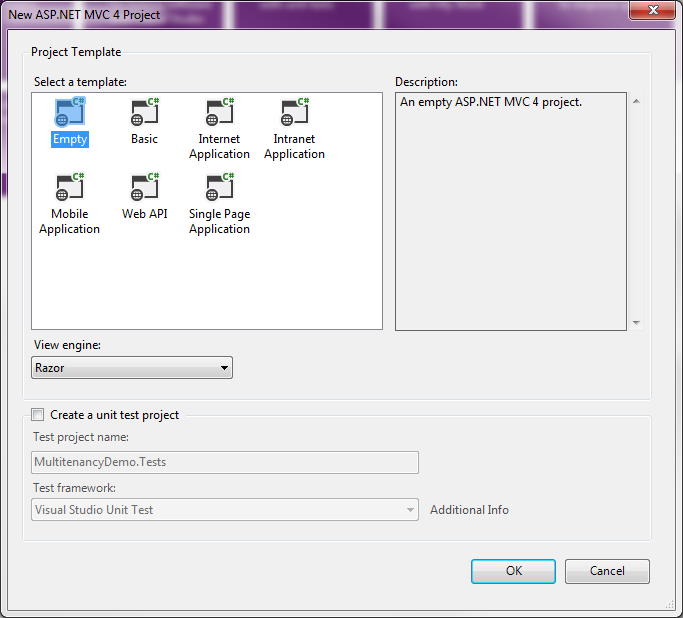
- In the New ASP.NET MVC 4 Project dialog, select the Empty project template, make sure that the View Engine is set to Razor, and uncheck the Create a unit test project checkbox. Click OK (Figure 5).
At this stage, Visual Studio will take over and create the project.
To configure the project properties:
- In the Solution Explorer, select the MultitenancyDemo project.
- On the main menu, select View → Property Pages. This will open the project properties page in the main editor window.
- Select the Web menu option. This will show the project web properties.
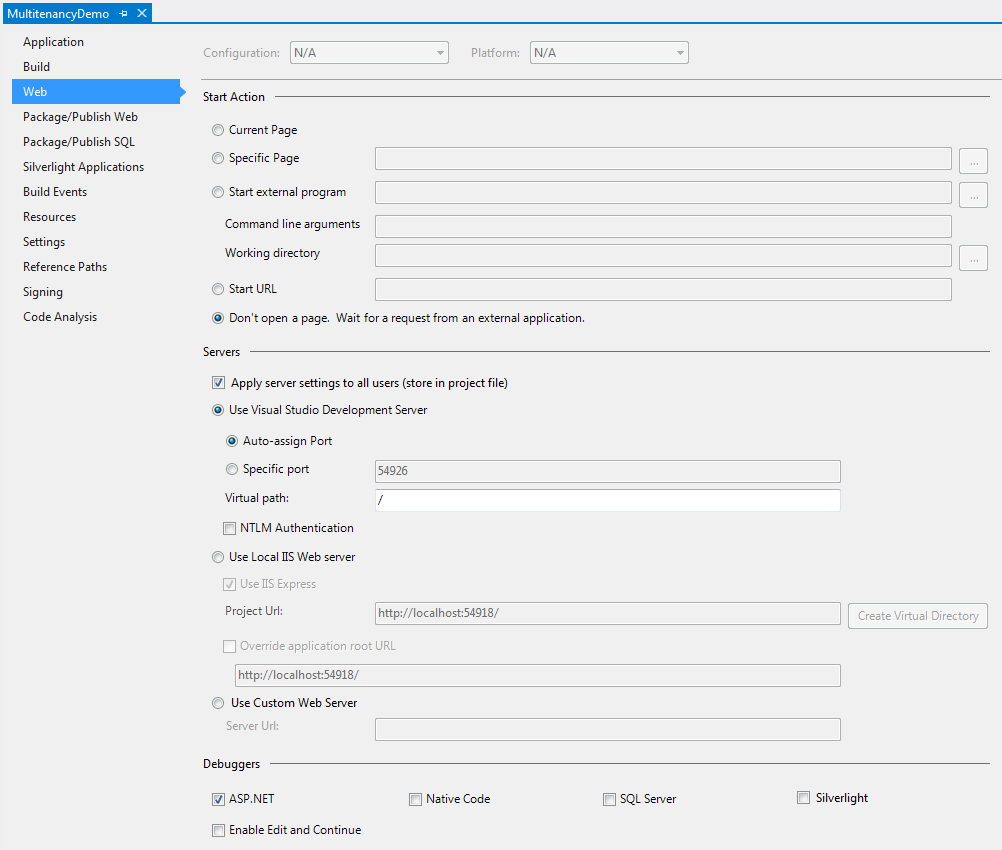
- In the Start Action section, check the Don’t open a page. Wait for a request from an external application radio button. This will prevent the application from automatically trying to load a page before we’ve sent a request for a client site.
- In the Servers section, check the Use Visual Studio Development Server radio button. The web properties page should look similar to Figure 6.
- Save and close the project properties page.
Creating the Data Layer
All of the client-specific data for the tenants is stored in a database that is retrieved by the application during request processing. First we’ll create the database, add a table for the tenant information, and populate it with data. Next we’ll simplify accessing the data from the application by setting up data access classes with LINQ to SQL. And, finally, we’ll create simple data provider that abstracts away our data access classes and gives the application a way to retrieve the client-specific information.
Creating the Database and Filling It with Data
To Create the database:
- In the Solution Explorer, select the App_Data folder.
- On the main menu, select Project → Add New Item. This will open the Add New Item dialog.
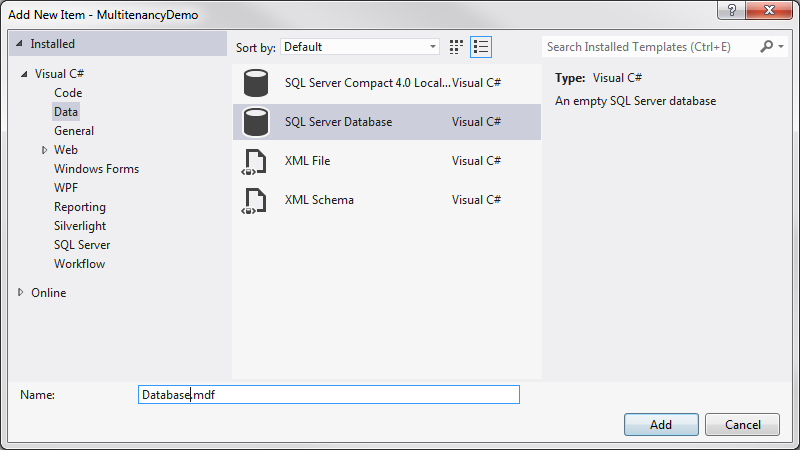
- In the Add New Item dialog select the Data menu option select the SQL Server Database template.
- Name the database Database.mdf. The Add New Item dialog should be similar to Figure 7.
- Click Add. Visual Studio should add a new database to the App_Data folder.
To create the Tenant table:
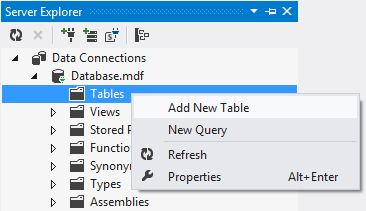
- In the Server Explorer, expand the Database.mdf tree.
- Right-click the Tables folder and select Add New Table from the context menu (Figure 8). This causes the Table Designer to open in the main editor window.
- In the T-SQL pane, update the SQL code to match Listing 2.
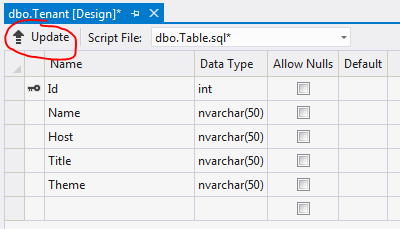
create table [dbo].[Tenant]
(
       [Id]       int             not null    primary key,
       [Name]     nvarchar(50)    not null,
       [Host]     nvarchar(50)    not null,
       [Title]    nvarchar(50)    not null,
       [Theme]    nvarchar(50)    not null
)
Listing 2: The Tenant table SQL code.
Table 1 briefly describes each column in the Tenant table.
| Column Name | Description |
|---|---|
| Id | Uniquely identifies the row. |
| Name | The name of the client. |
| Host | The host name that identifies the client to IIS. |
| Title | The title of the client site. |
| Theme | The name of the client’s CSS file. |
Table 1: The Tenant Table column descriptions.
- To save the table and update the database, click the Update button in the Table Designer (Figure 9). This causes the Preview Database Updates dialog to open.
- In the Preview Database Updates dialog, click Update Database. The Data Tools Operations pane should open and show the update progress.
- When the update operation completes, close the Table Designer.
To populate the tenant table:
- In the Server Explorer, click the Refresh button to see the table in the database tree view.
- Right-click the new Tenant table and select Show Table Data from the context menu (Figure 10). This opens the table data editor in the main editor window.

- At the start, the Tenant table is empty so all of the table cells have a value of NULL. Fill in the table cells according to Table 2.
| Id | Name | Host | Title | Theme |
|---|---|---|---|---|
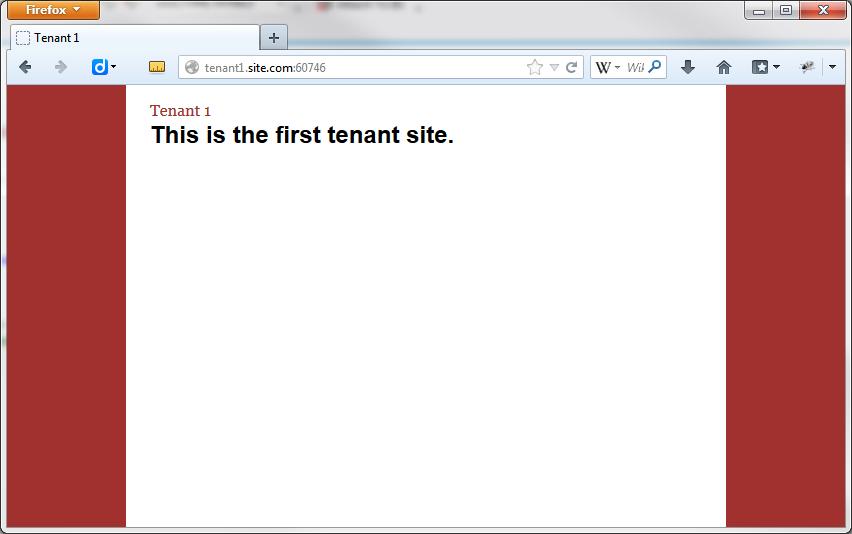
| 0 | Tenant 1 | tenant1.site.com | This is the first tenant site. | tenant1.css |
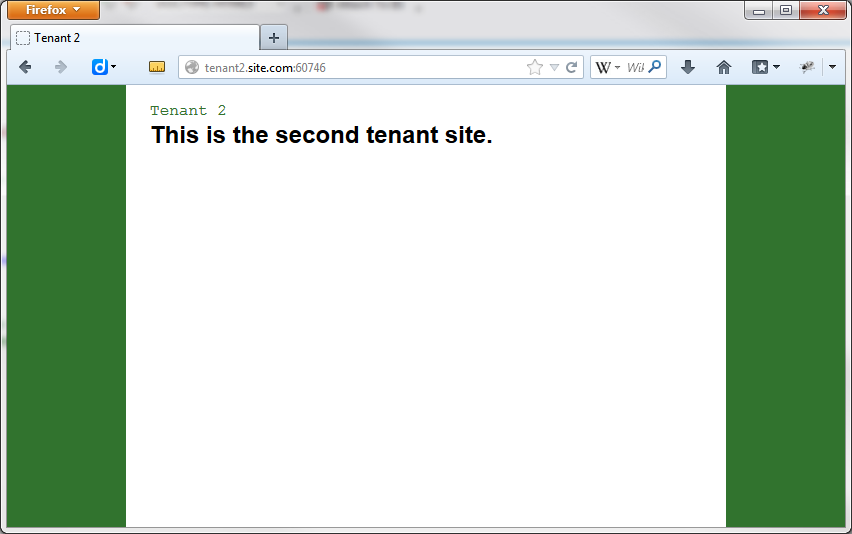
| 1 | Tenant 2 | tenant2.site.com | This is the second tenant site. | tenant2.css |
Table 2: The Tenant table data.
- Once the table has been filled in, close the table editor.
Configuring Data Access with LINQ to SQL
Now that the database has been created and populated with data we can create the data access classes that will map the contents of the Tenants table with the application code. To accomplish this quickly and easily we’re going to use the LINQ to SQL mapping features.
To map the data access classes:
- In the Solution Explorer, select the MultitenancyDemo project.
- On the main menu, select Project → New Folder. This adds a new folder to the project tree.
- Name the new folder DataAccess and select it.
- On the main menu, select Project → Add New Item. This opens the Add New Item dialog.
- In the Add New Item dialog, select the Data menu option and the LINQ to SQL Classes template item.
- Name the new item DataClasses.dbml. The Add New Item dialog should look similar to Figure 11.
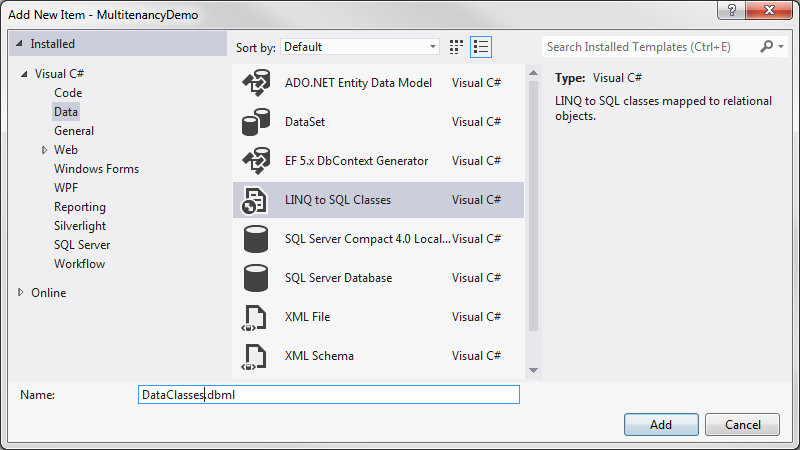
- Click Add. This opens the Object Relational Designer.
- From the Server Explorer, drag the Tenant table to the designer surface. This will create a class representation similar to Figure 12.
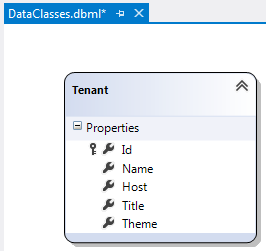
- Save and close the Object Relational Designer.
Creating the Data Provider
To provide access to the data access classes that we’ve just created and to allow for an abstraction between the data and application layers we’re going to create a simple data provider that allows access to the database data from the application through an interface. Behind the interface we’ll add a class implementation that actually manages the data interaction.
To create the data provider interface:
- In the Solution Explorer, select the DataAccess folder.
- On the main menu, select Project → Add New Item. This opens the Add New Item dialog.
- In the Add New Item dialog, select the Code menu option and select the Interface template type.
- Name the interface ITenantDataProvider. The Add New Item dialog should look similar to Figure 13.
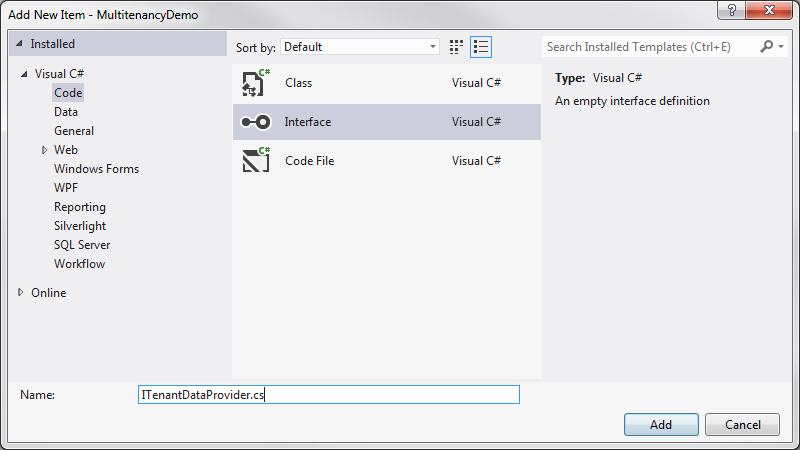
- Click Add. This opens the ITenantDataProvider in the main editor window.
- Update the ITenantDataProvider code file to match Listing 3.
namespace MultitenancyDemo.DataAccess
{
    public interface ITenantDataProvider
    {
        Tenant GetTenant(string host);
    }
}
Listing 3: The ITenantDataProvider code.
- Save and close the ITenantDataProvider code file.
To Create the data provider class:
- In the Solution Explorer, select the DataAccess folder.
- On the main menu, select Project → Add New Item. This opens the New Item dialog.
- In the New Item dialog, select the Code menu item and select the Class template.
- Name the class item LinqTenantDataProvider. The Add New Item dialog should similar to Figure 14.
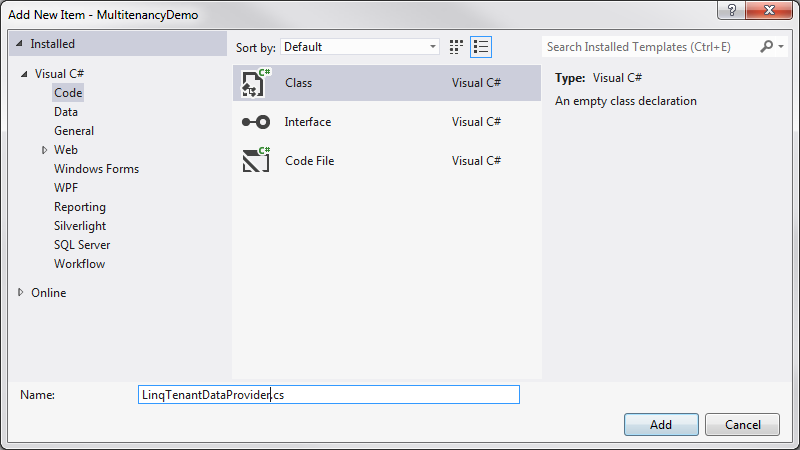
- Click Add. This opens the LinqTenantDataProvider code file in the main editor window.
- Update the LinqTenantDataProvider to match Listing 4.
namespace MultitenancyDemo.DataAccess
{
    using System;
    using System.Collections.Generic;
    using System.Linq;
    using System.Web;

    public class LinqTenantDataProvider : ITenantDataProvider
    {
        public LinqTenantDataProvider()
        {
        }

        public Tenant GetTenant(string host)
        {
            // Verify the host name.
            if (string.IsNullOrEmpty(host))
            {
                throw new ArgumentNullException("host");
            }

            // If the host name has a port number, strip it out.
            int portNumberIndex = host.LastIndexOf(':');
            if (portNumberIndex > 0)
            {
                host = host.Substring(0, portNumberIndex);
            }

            // Get an instance of the LINQ to SQL database.
            DataClassesDataContext database =
                                      new DataClassesDataContext();

            // From the list of tenants in the LINQ to SQL database
            // select the tenant where the tenant host matches the
            // host name.
            Tenant result = (from tenant in database.Tenants
                             where tenant.Host == host
                             select tenant).SingleOrDefault();

            // Return the selected tenant or <null> if a matching
            // tenant was not found.
            return result;
        }
    }
}
Listing 4: The LinqTenantDataProvider code.
- Save and close the LinqTenantDataProvider code file.
Creating the Application Layer
The next step is to create the application layer. This section of the application is really the heart of the operation. It’s responsible for accepting the requests from the server, retrieving the client data from the database, and sending the viewable response back to the server (and ultimately on to the user).
First we’ll create the PageModel class which is a container for the data required by the view. Then we’ll create the HomeController class that contains all coordinating logic for the application.
To create the PageModel Class:
- In the Solution Explorer, select the Models folder.
- On the main menu, select Project → Add New Item. This opens the New Item dialog.
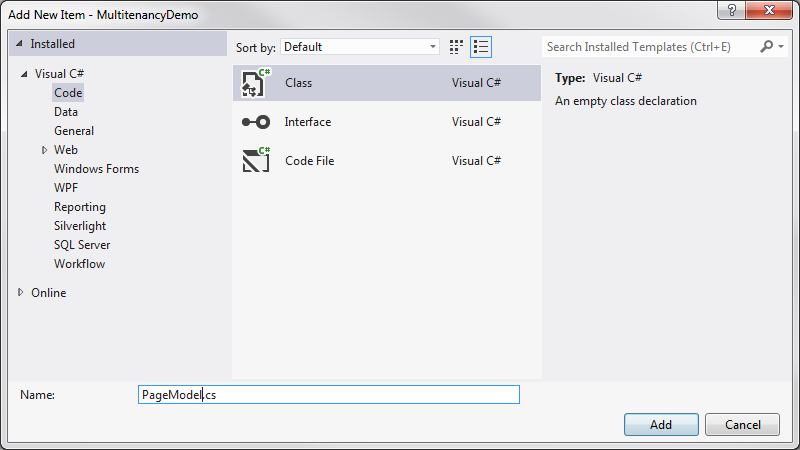
- In the New Item dialog, select the Code menu option and select the Class template.
- Name the new item PageModel. The New Item dialog should look similar to Figure 15.
- Click Add. This opens the PageModel code file in the main editor window.
- Update the PageModel code file to match Listing 5.
namespace MultitenancyDemo.Models
{
    public sealed class PageModel
    {
        public PageModel()
        {
        }

        public string Name { get; set; }
        public string Title { get; set; }
        public string Theme { get; set; }
    }
}
Listing 5: The PageModel code.
- Save and close the PageModel code file.
To create the HomeController class:
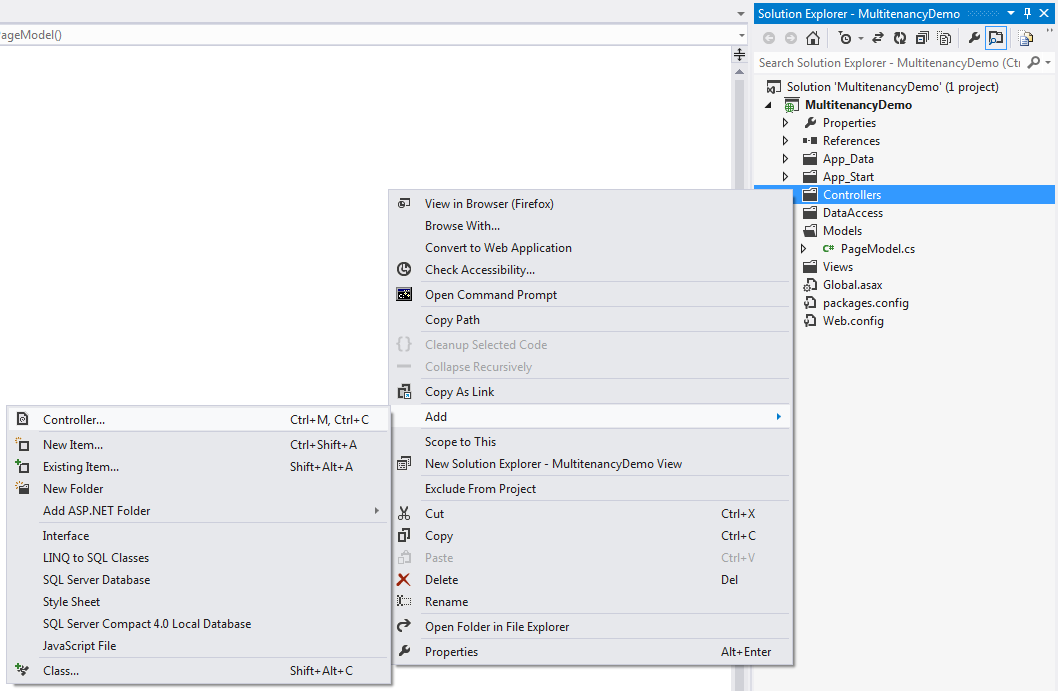
- In the SolutionExplorer, select the Controllers folder.
- Right-click the Controllers folder and select Add → Controller from the context menu (Figure 16). This opens the Add Controller dialog.
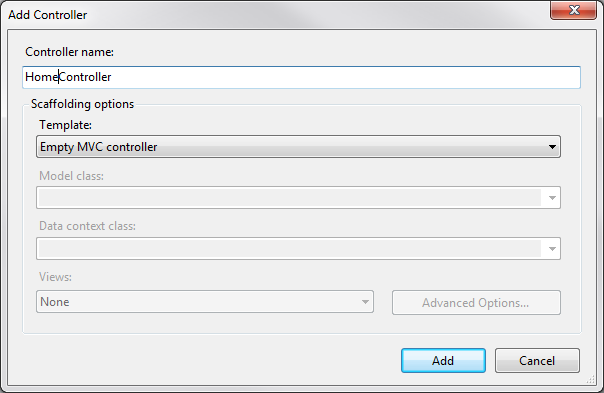
- In the Add Controller dialog, set the controller name to HomeController and select Empty MVC Controller from the Template drop-down box. The Add Controller dialog should look similar to Figure 17.
- Click Add. This opens the HomeController code file in the main editor window.
- Update the HomeController code file to match Listing 6.
namespace MultitenancyDemo.Controllers
{
using System.Web.Mvc;
using MultitenancyDemo.DataAccess;
using MultitenancyDemo.Models;
public class HomeController : Controller
{
[HttpGet]
public ActionResult Index()
{
// Get the client host name from the incoming request.
string host = this.Request.Headers["Host"].ToLower();
// Retrieve the client-specific data from
// the data provider.
ITenantDataProvider provider =
new LinqTenantDataProvider();
Tenant tenant = provider.GetTenant(host);
// Create the PageModel.
PageModel result = new PageModel()
{
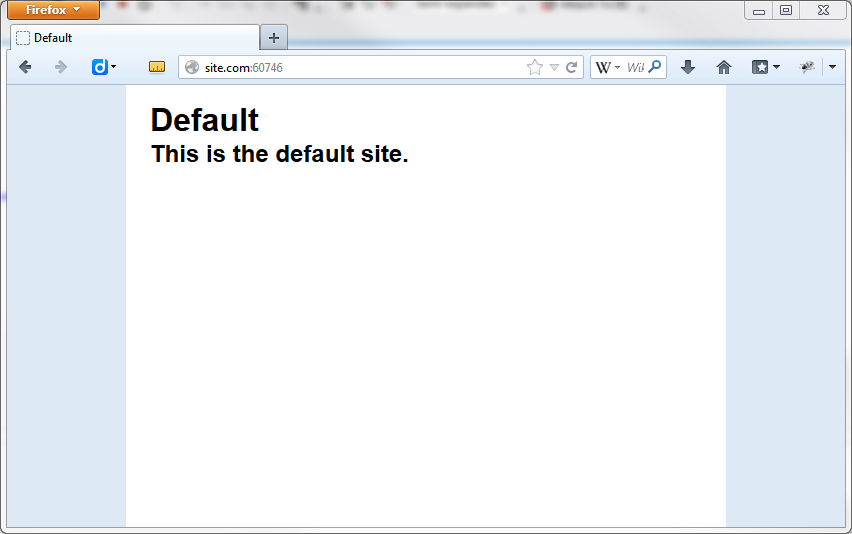
Name = "Default",
Title = "This is the default site.",
Theme = string.Empty
};
// If client-specific data was returned, put it
// in the PageModel.
if (tenant != null)
{
result.Name = tenant.Name;
result.Title = tenant.Title;
result.Theme = tenant.Theme;
}
// Return the Index view with the PageModel data.
return View(result);
}
}
}
Listing 6: The HomeController code.
- Save and close the HomeController code file.
Creating the Presentation
The final step in creating the application to define the presentation layer. To accomplish this, we’re going to create a default page layout that defines the structure of the root and tenant sites. Then we’ll match that layout with the Index view that is returned by the HomeController and, finally, we add the CSS files the handle the styling that is unique to the root site and the tenant sites.
To Create the default layout:
- In the Solution Explorer, select the Views folder.
- On the main menu, select Project → New Folder. This adds a child folder under the Views folder.
- Name the new folder Shared and select it.
- On the main menu, select Project → Add New Item. This opens the Add New Item dialog.
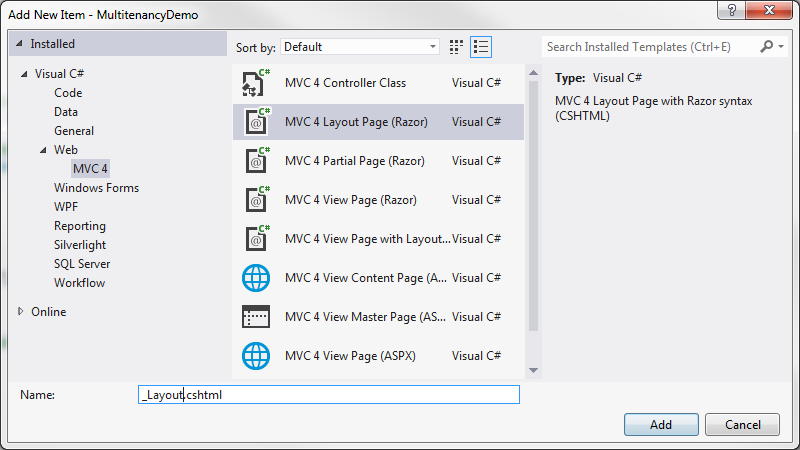
- In the Add New Item dialog, expand the Web menu and select the MVC 4 menu option, select the MVC 4 Layout Page (Razor) template.
- Name the new item _Layout.cshtml. The Add New Item dialog should look similar to Figure 18.
- Click Add. This opens the _Layout code file in the main editor.
- Update the _Layout code file to match Listing 7.
<!DOCTYPE html>

<html>
    <head>
        <meta name="viewport" content="width=device-width" />
        <title>@ViewBag.Title</title>

        <!-- This is the default stylesheet for
             the root site and all clients. -->
        <link type="text/css" rel="stylesheet"
                                         href="Content/site.css" />

        <!-- If the PageModel has a CSS file defined,
             it will reference it here. -->
        @RenderSection("styles", false)
    </head>
    <body>
        <div id="page">
            <!-- The content of the Index view will
                 be rendered here. -->
            @RenderBody()
        </div>
    </body>
</html>
Listing 7: The _Layout code.
To create the Index view:
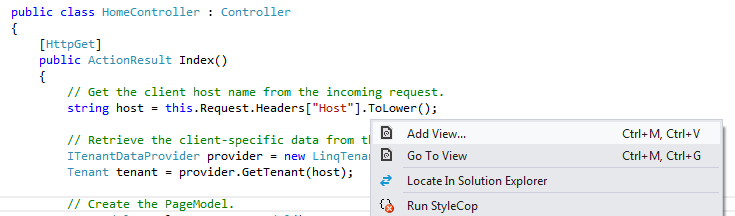
- In the Solution Explorer, under the Controllers folder, double-click the HomeController file. This opens the HomeController code file in the main editor window.
- Right-click anywhere inside the Index method and select Add View from the context menu (Figure 19). This opens the Add View dialog.
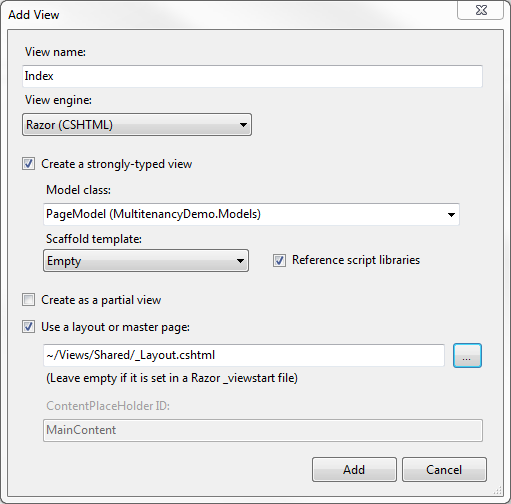
- In the Add View dialog, set the View Name to Index.
- Check the Create a strongly-typed view checkbox.
- Select PageModel (MultitenancyDemo.Models) from the Model Class drop-down list.
- Check the Use a layout or master page checkbox.
- Click the browse button and select the _Layout.cshtml file. Click OK. The Add View dialog should look similar to Figure 20.
- Click Add. This opens the Index code file in the main editor window.
- Update the Index code file to match Listing 8.
@using MultitenancyDemo.Models;
@model PageModel

@{
    ViewBag.Title = @Model.Name;
    Layout = "~/Views/Shared/_Layout.cshtml";
}

<!-- If this is a client site with a theme defined,
     reference it here. -->
@if (!string.IsNullOrEmpty(Model.Theme))
{
    @section styles {
        <link type="text/css" rel="stylesheet"
                                       href="Content/ @Model.Theme" />
    }
}

<!-- This is the page body that renders in the
     RenderBody() method of the default layout. -->
<h1>@Model.Name</h1>
<h2>@Model.Title</h2>
Listing 8: The Index view code.
- Save and close the Index code file.
Adding the Default CSS File
The default CSS file forms the basic styling for the root site and the tenant sites. Because we’ve defined the basic styling that common to all the clients in the default CSS file the only styles that need to be in the client-specific CSS files that those that are unique or override the defaults.
To add the default CSS file:
- In Solution Explorer, select the MultitenancyDemo project.
- On the main menu, select Project → New Folder.
- Name the new folder Content and select it.
- On the main menu, select Project → Add New Item. This opens the New Item dialog.
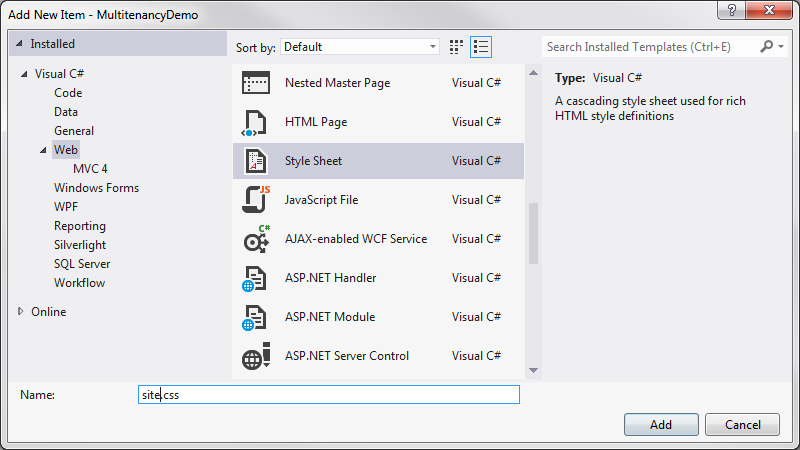
- In the Add New Item dialog, select the Web menu option and select the Stylesheet item template.
- Name the new item site.css. The Add New Item dialog should look similar to Figure 21.
- Click Add. This opens the site code file in the main editor window.
- Update the site code file to match Listing 9.
* {
    margin: 0;
    padding: 0;
    -webkit-box-sizing: border-box;
       -moz-box-sizing: border-box;
            box-sizing: border-box;
}

html {
    font: normal 100% Arial, Helvetica, sans-serif;
    font-size: 16px;
    height: 100%;
}

body {
    background-color: #DDEAF6;
    height: 100%;
}

#page {
    background-color: #FFFFFF;
    height: 100%;
    margin: auto;
    padding: 1rem 1.5rem;
    width: 37.5rem;
}
Listing 9: The site.css code.
- Save and close the site code file.
Adding the Client CSS Files
Now that the default styles have been defined we can define the client-specific styles.
To add the client CSS files:
- Following the steps in Adding the default CSS file, add two new stylesheets to the Contents folder named tenant1.css and tenant2.css.
- Open the tenant1 code file in the main editor window and update it to match Listing 10.
body {
    background: #A1312E;
}

h1 {
    color: #A1312E;
    font: normal 100% Georgia, 'Times New Roman', serif;
}
Listing 10: The tenant1.css code.
- Save and close the tenant1.css code file.
- Open the tenant2.css code in the main editor window and update it to match Listing 11.
body {
    background: #31732E;
}

h1 {
    color: #31732E;
    font: normal 100% 'Courier New', sans-serif;
}
Listing 11: The tenant2.css code.
- Save and close the tenant2.css code file.
Running the Application
At this stage our code is complete and it’s time to build and run the application.
To build and Run the Application:
- On the main menu select Build → Build Solution. The solution should build cleanly. If it doesn’t, inspect the errors that Visual Studio provides and compare your code against the listings in this walkthrough. Don’t go past this step until you get a clean build.
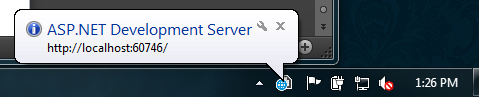
- Press F5 to start the application. Visual Studio should indicate that the application has started and is waiting for external requests. The Visual Studio development server should raise a notification indicating the port that the server is listening on. Make a note of this port number since it’s likely to change every time you run the application (Figure 22).
- Open an Internet browser and navigate to site.com. The browser should display a result similar to Figure 23.
- Next, navigate to tenant1.site.com at the port number used in the previous step. The result should look similar to Figure 24.
- Finally, navigate to tenant2.site.com at the port number used in the first step. The result should look similar to Figure 25.
Wrapping Up
And there it is! Simple multitenancy in ASP.NET MVC 4. It should be pointed out that, while this walkthrough demonstrates the principle of multitenancy, this should not be considered production-ready code.
Some points to consider for extending the application would be to better abstract the data provider by creating a service class so that the LinqTenantDataProvider isn’t strongly coupled to the HomeController. In addition, for anything other than a trivial set of data I don’t recommend using LINQ to SQL data access classes. A much more robust approach would be to use stored procedures or inlining the SQL code in the data provider. That way you won’t have to remap the data object model and update the application each time the database changes. In a similar spirit, I would abstract the PageModel so that the Index view could accept an interface version of it (IPageModel). This allows for model reuse between controllers since the attendant views are expecting interfaces instead of hard implementations.
Thanks for taking the time to work with this walkthrough, I hope you got something useful out of it!