
Summary
An unusual quirk of the new Razor view engine in MVC 5 with Visual Studio 2013 seems to be that if you set the solution output path to anything other than the default project’s bin folder you’ll lose syntax highlighting and Intellisense support in the application views. After some research and exploring on my own I’ve found an approach that restores Intellisense and still allows for sending compiled output to a folder other than the project bin.
This article starts with creating a basic MVC 5 ASP.NET web application to demonstrate the default implementation expected by the underlying system. Then the application is changed to direct the compiled output to an external staging folder to demonstrate how changing the OutputPath of the project file breaks Intellisense. Finally, an implementation is demonstrated that restores Intellisense whilst still allowing files to be staged in an external folder by setting the OutputPath to the project bin folder and using custom build targets to copy the compiled output to the staging folder.
Starting From the Default
Let’s start with the default. We’ll create a new, blank solution and then add a new ASP.NET web application targeting .NET 4.5.1. Once we’ve got a bog standard MVC 5 application we’ll take a look at how it’s set up and then explore how it goes wrong.
Creating the Blank Solution
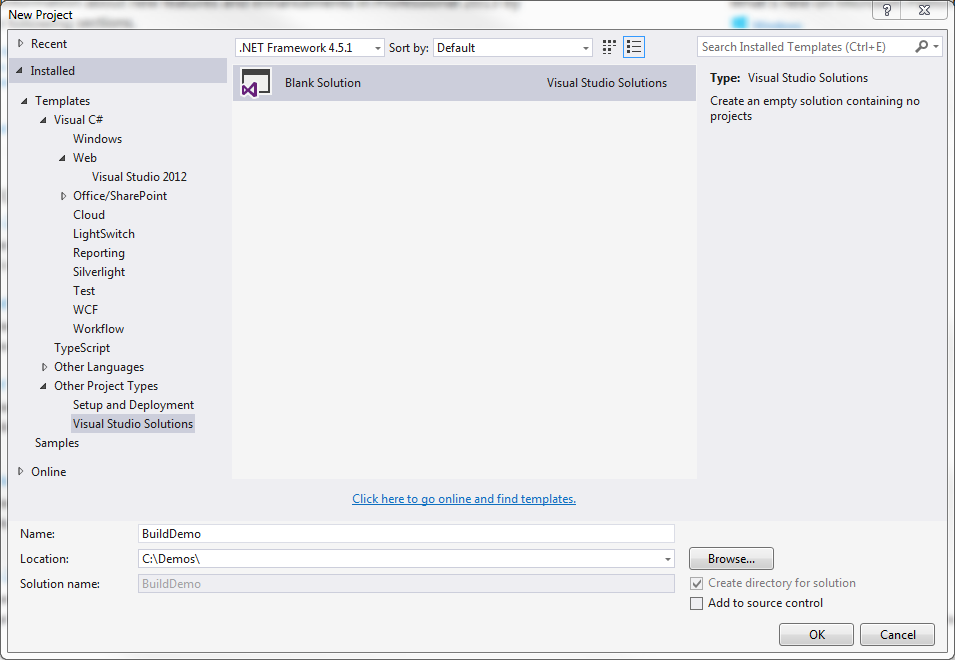
- From Visual Studio 2013, click FILE –> New Project. This opens the New Project dialog.
- In Templates pane, select Templates –> Other Project Types –> Visual Studio Solutions.
- Make sure that the target framework is set to .NET Framework 4.5.1
- Make sure that the Blank Solution template is selected.
- Fill in the solution name and location.
- Click OK
Creating the ASP.NET Web Application
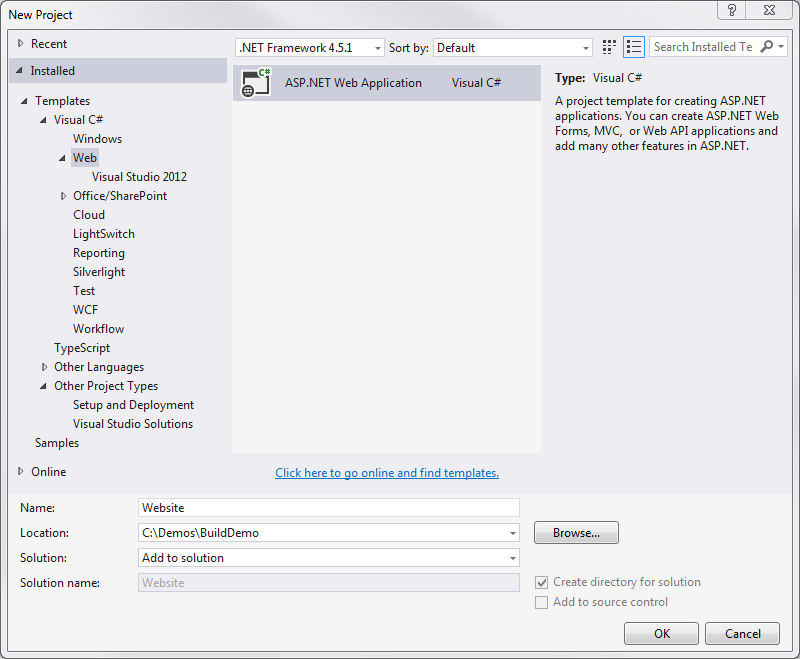
- Click FILE –> New Project. This opens the New Project dialog.
- In the Templates pane, select Tempates –> Visual C# –> Web.
- Make sure that the target framework is set to .NET Framework 4.5.1.
- Make sure that the ASP.NET Web Application template is selected.
- Fill in the project name.
- Select the Add to Solution option in the Solution drop-down menu.
- Click OK. The New ASP.NET Project dialog will open.
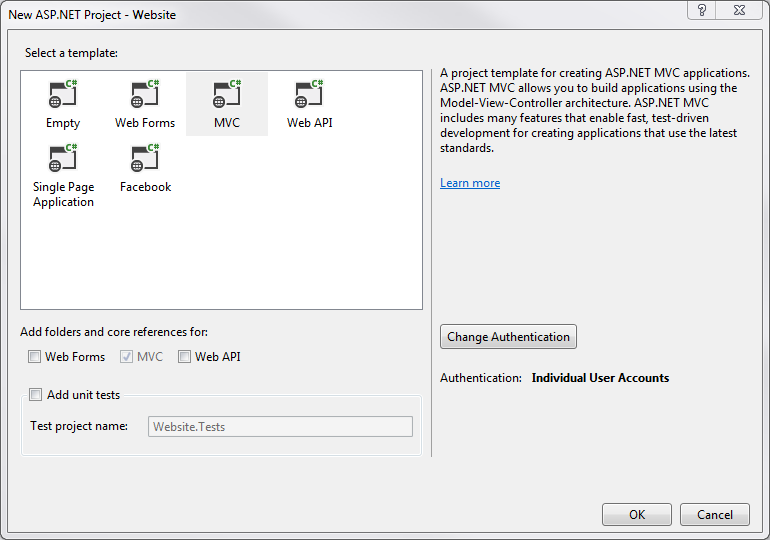
- In the Select a template pane, select MVC.
- In the Add folders and create core references for menu make sure that the MVC box is checked.
- Leave the Add unit tests box unchecked
- Make sure that the Authentication model is set to Individual User Accounts.
- Click OK. This causes Visual Studio to add the project and set the initial scaffolding.
Updating the NuGet Packages
By default, the ASP.NET Web Application sets up more than a dozen NuGet packages that contain everything from core ASP.NET capabilities to JavaScript libraries to Entity Framework components.
To Update the NuGet Packages
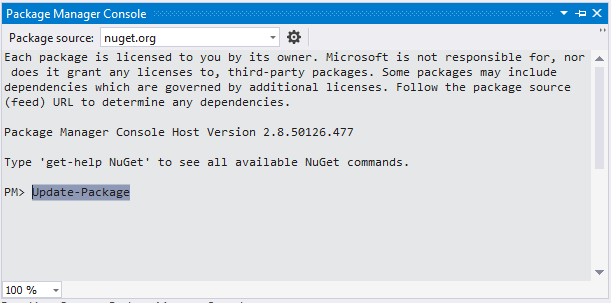
- Select TOOLS –> NuGet Package Manager –> Package Manager Console. This opens the Package Manager Console pane.
- At the PMC command prompt, type Update-Package and press Enter. This launches the PowerShell scripts that downloads and installs all available updates for all the NuGet packages for all the projects in the solution.
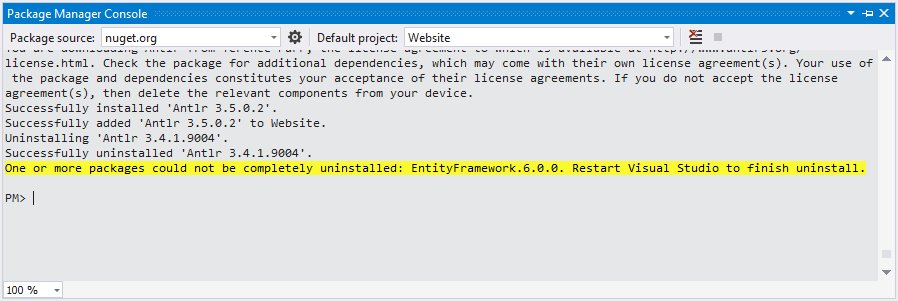
Note: Once the package update has completed, there may be a result that reads ‘One or more packages could not be completely uninstalled…. Restart Visual Studio to finish uninstall’.
- If necessary, save the solution then close and reopen the Visual Studio to complete the package update.
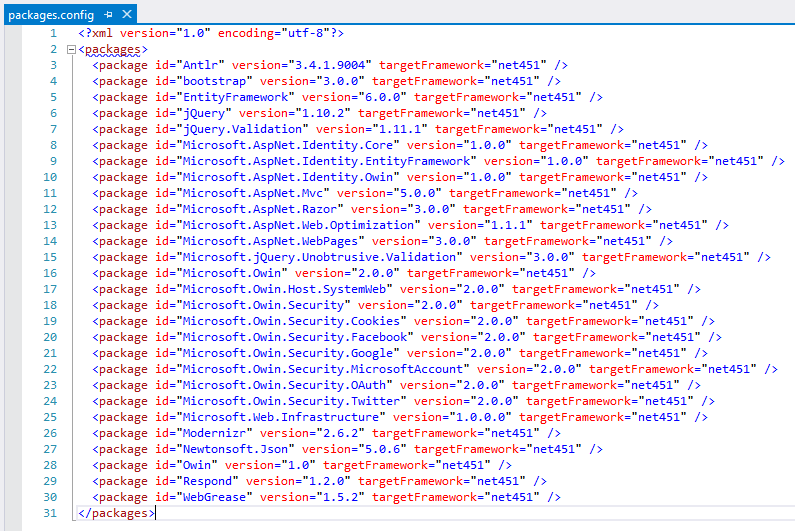
Once the solution has re-opened. Viewing the packages.config file will show that the NuGet packages have been updated.

Exploring the Project
At this point we’ve created the solution, added the ASP.NET web application project, and updated the NuGet packages. We’re now ready to take a look at the default set up.
The Default Configuration
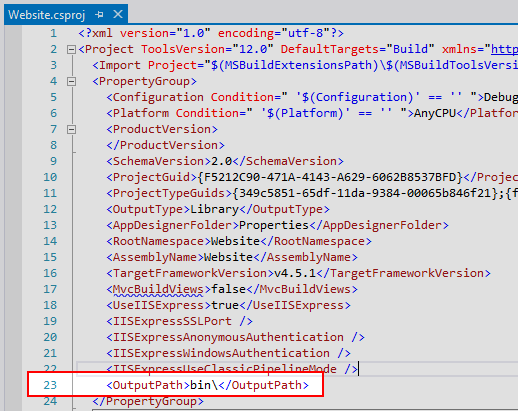
Right-click on the ASP.NET web application project and select Edit Project File. This will open the project file in the editor. Essentially a .csproj file is nothing more than an XML document that contains the configuration information that identifies what kind of a project it is, what it contains, and how it should work. For the purposes of this exercise, we’re most interested in the property groups that set properties based on the configuration and platform values. In particular, we’re looking at the OutputPath element.
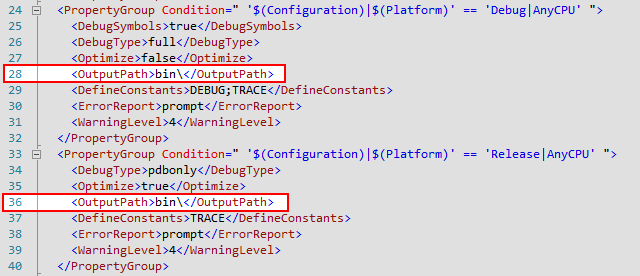
These elements tell MSBuild where to place files once they’ve been compiled. By default, the OutputPath target is the bin folder of the containing project (in this example, Website\bin\).
The bin Folder
Right-click the project in the Solution Explorer and select Reload Project. If a dialog opens asking if you want to close the file in the editor, click Yes. This reloads the project and allows you to navigate its contents.
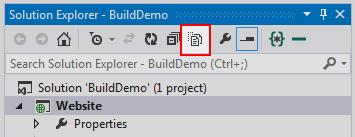
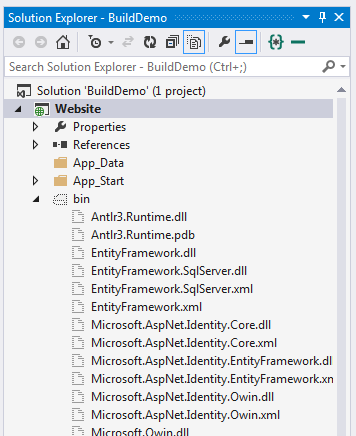
Next, select the project and, in the Solution Explorer menu, select Show All Files. This will show the bin directory and all its contents.
.cshtml Files
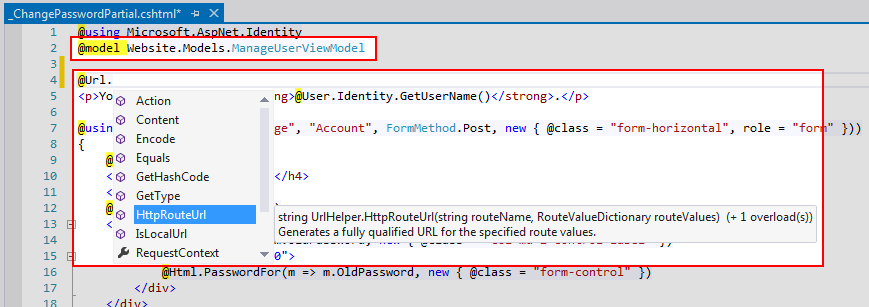
In the Solution Explorer, navigate to one of the Views folders and double-click on a .cshtml file. This opens the file in the editor and you should see that there’s support for syntax highlighting and Intellisense.
Changing the OutputPath Element
Now the solution is set up and it’s been verified that everything is working as expected. Under normal circumstances this is more than enough to get started with the primary application development. But what if there’s a scenario where the solution is complex and has several projects that need to be managed? In many cases it’s not uncommon to want to have the compiled files dumped to an external staging directory that can serve as a base for builds or distributed installations.
Using this scenario as a use case we’re going to create an external staging directory and update the OutputPath element in the project configuration such that the compiled files are placed in the staging directory.
Creating the Staging Directory
In Windows Explorer create a folder outside of the set of folders used by the solution. In my example, the solution folders are stored under C:\Demos so I’ve created a folder called C:\Staging to hold the compiled output.
Updating the Project Configuration
- In Visual Studio, right-click the ASP.NET web application project and select Edit Project File. This opens the project file in the code editor.
- In the first PropertyGroup element, add an OutputPath element that points to the C:\Staging folder.
- Next, add a reference to the solution configuration (Debug or Release) to the OutputPath element you’ve just created. This will allow us to differentiate between the development files that are used for debugging and the release-ready files that are used for deployments. Make sure that you add a trailing back-slash to the path.
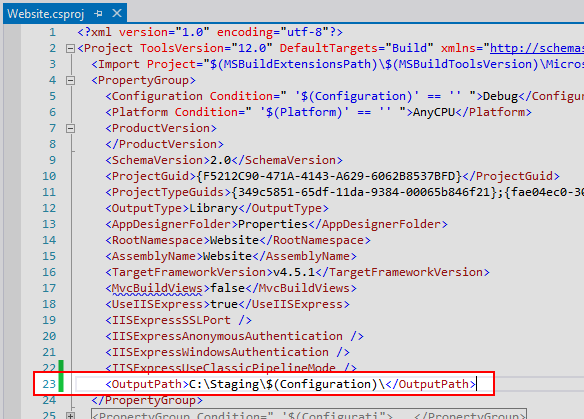
- Next, remove the references to OutputPath from the Debug and Release PropertyGroups. So you should wind up with a single reference to the OutputPath in the first PropertyGroup of the project file.
- Save the changes.
- In the Solution Explorer, right-click the project and select Reload Project (accepting any dialog boxes that may appear).
Initiating a Build
- In the Solution Explorer, make sure that the Show All Files option is selected and navigate to the project’s bin folder.
- Select the compiled contents of the bin folder.
- Right-click the selected items and click Delete. This will open a confirmation box indicating that the deletion is permanent. Click OK to delete the files.
- Right-click the solution and select Clean Solution.
- Right-click the solution and select Build Solution. This initiates the build and everything should build without error.
Inspecting the Build
- Again, in the Solution Explorer, make sure that the Show All Files option is selected and select the project.
- Click the Refresh option in the Solution Explorer.
- You should notice that the contents of the project’s bin folder have not been updated.
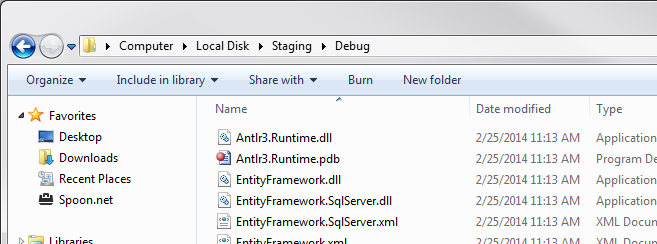
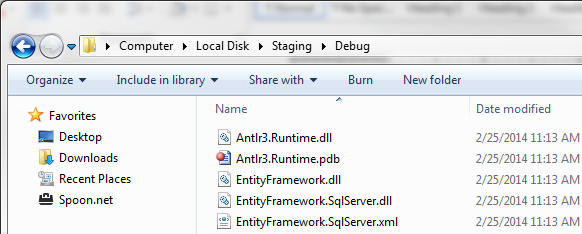
- Navigate to the staging folder in Windows Explorer. You should see single directory titled Debug.
When we changed the OutputPath in the project configuration we instructed the system to place the compiled output in the staging directory based on the current configuration. Opening the Debug folder should display the compiled files that had previously been stored in the project bin directory.
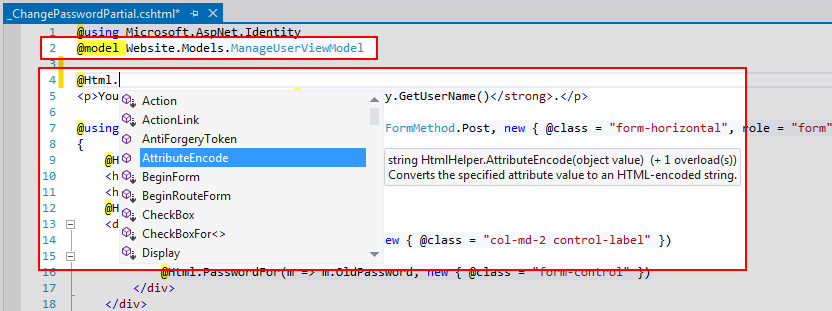
- In the Visual Studio Solution Explorer, open one of the project views in the code editor. You’ll see that the syntax highlighting and Intellisense support has been lost.
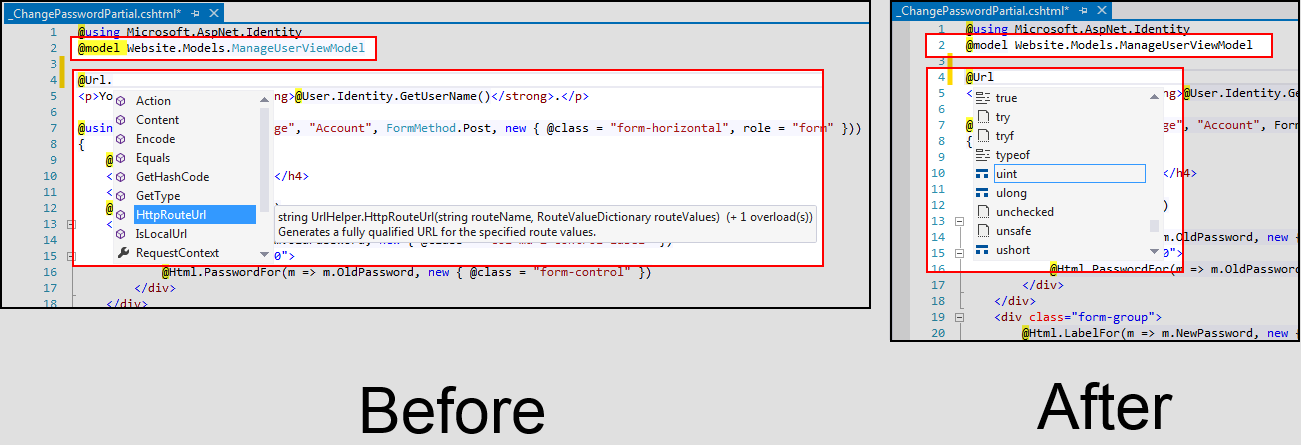
To verify that Intellisense support has truly been lost close the view and then close and re-open Visual Studio. Re-opening the view will show the same result – no Intellisense. Other tests that demonstrate the loss are to clean and build the solution or to clean and build the project. In all cases the tests fail and Intellisense is no longer supported in the view.
Thinking about the Problem
Interestingly, the break only seems to affect .cshtml files. If you inspect the .cs files you should find that syntax highlighting and Intellisense work as expected. What’s more, you can still run the project. So the solution still builds and executes as expected. The problem seems to be specifically related to the Razor view engine and Intellisense based on where the output files are kept.
Researching Solutions
After researching the problem on the Internet I was unable to come up with a clear explanation for why. Though, I did find a couple of workarounds/solutions (which we’ll get to in a minute). One of the solutions offered up this comment on why things aren’t working as expected:
As to the reason why this does not work correctly: I believe the intellisense provider for cshtml files compiles these in the background using the web.config s it finds in the solution and expects the resulting .dll s to be stored in the bin directory (which is the default output directory for WebApplication projects) However Class libraries have different subfolders depending on the build type (bin/Debug, bin/Release, bin/<buildtype> ) and thus the IntellisenseProvider cannot find these files. I think the Intellisense/MVC/Razor/ASP.NET developement team could fix this easily, however it is a rare bug because putting Views into separate assemblies is currently an edge case for MVC. (hopefully not in the future)
“Enabling MVC5 intellisense in a ClassLibrary Project.” Thetoeb, 5 January 2014. Web. 24 February 2014. http://thetoeb.wordpress.com/2014/01/05/enabling-mvc5-intellisense-in-a-classlibrary-project/
I don’t think this directly addresses the problem but I do think it offers a clue.
In any event, all of the discussion related to the problem that I found online pointed to, essentially, the same answer. The only way to get the Intellisense support back is set the output path back to the bin directory. No ifs, ands, or buts. All your OutputPath are belong to Razor.
Alternate Solution Attempts
Not content with what I found online I tried a few approaches of my own.
First, I tried adding MSBuild .targets files to the solution where the solution would compile its output to the staging folder as intended and then copy the output back to the bin directory. This didn’t work.
Next I tried updating the .targets such that, instead of physically copying files, they created symbolic links where the bin\Debug folder linked to the compiled output in the staging directory. This didn’t work either.
If I changed the OutputPath back to the bin directory and compiled the solution then everything worked as expected. The syntax highlighting and Intellisense support was restored. So I made a third attempt where the solution was compiled to the bin directory and symbolic links were created in the staging directory (essentially the previous solution in reverse). This worked but I don’t love it as a solution. The idea behind the separate staging directory is to isolate the files that are release-ready. Having them linked to a dynamic (and volatile) source made me nervous.
In the end I had to conclude that the Internet was right. The solution is that the OutputPath element absolutely must point to the project bin directory.
Implementing the Solution
The solution that I implemented is pretty simple. I changed the OutputPath element back so that it points to the bin directory. This clears up the Intellisense issue. Then I added a build target that copies the compiled files to the staging directory. It’s not what I would consider ideal but it does resolve the problem and allows me to maintain the separation between my development and staging files.
Updating the Project Configuration and Building the Solution
- In the Visual Studio Solution Explorer, right-click the project and select Edit Project File. This opens the project configuration in the code editor.
- Update the OutputPath element in the first PropertyGroup such that it points to the bin directory.
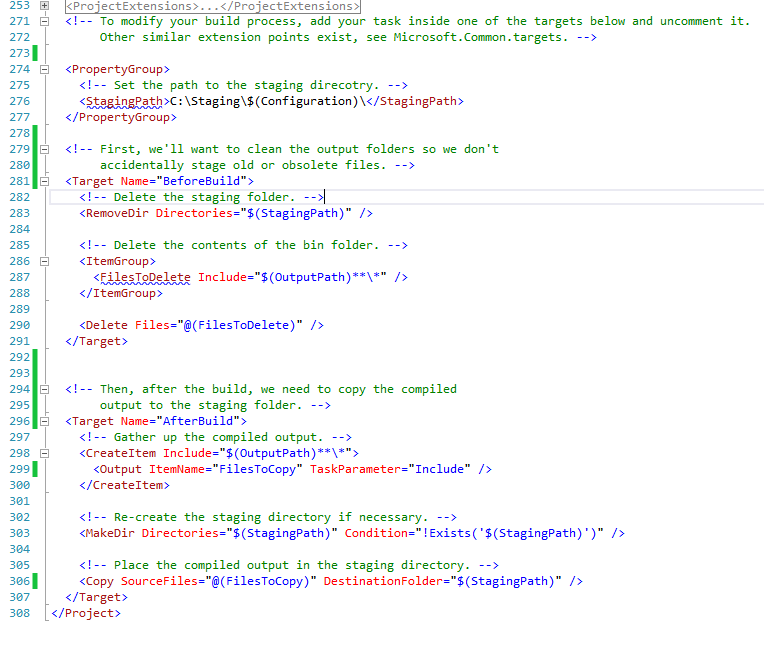
- Navigate to the bottom of the file. There should be a section of code that has been commented out. This is where we’re going to add the build target that handles copying the files to the staging directory. This is okay for the purposes of the exercise but in a real-world scenario I would recommend putting these targets in a separate MSBuild .targets file.

- Uncomment the before- and after- build targets.
- Add a PropertyGroup with an element to hold the path to the output staging directory.
<PropertyGroup>
     <!-- Set the path to the staging directory. -->
     <StagingPath>C:\Staging\$(Configuration)\</StagingPath>
</PropertyGroup>
Listing 1: The StagingPath PropertyGroup in the project file.
- Add contents to the BeforeBuild target node that clears out the previous build output.
<!-- First, we’ll want to clean out the output folders so we don’t accidentally stage old or obsolete files. -->
<Target Name=”BeforeBuild”>
     <!-- Delete the staging folder -->
     <RemoveDir Directories=”$(StagingPath)” />

     <!-- Delete the contents of the bin folder -->
     <ItemGroup>
          <FilesToDelete Include=”$(OutputPath)**\*” />
     </ItemGroup>

     <Delete Files=”@(FilesToDelete)” />
</Target>
Listing 2: The custom BeforeBuild build target in the project file.
- Finally, add contents to the AfterBuild target node that copies the compiled output to the staging directory.
<!-- Then, after the build, we need to copy the compiled output to the staging folder. -->
<Target Name=”AfterBuild”>
     <!-- Gather up the compiled output. -->
     <CreateItem Include=”$(OutputPath)**\*”>
          <Output ItemName=”FilesToCopy” TaskParameter=”Include” />
     </CreateItem>

     <!-- Re-create the staging directory if necessary. -->
     <MakeDir Directories=”$(StagingPath)” Condition=”!Exists(‘$(StagingPath)’)” />

     <!-- Place the compiled output in the staging directory. -->
     <Copy SourceFiles=”@(FilesToCopy)” DestinationFolder=”$(StagingPath)” />
</Target>
Listing 3: The custom AfterBuild build target in the project file.
The updated project configuration should be similar to the code in figure 17 below:
- Save the changes and re-load the project (accepting any dialogs that may appear).
- Delete the contents of the bin directory.
- Delete the contents of the staging directory.
- Build the solution.
Inspecting the Build
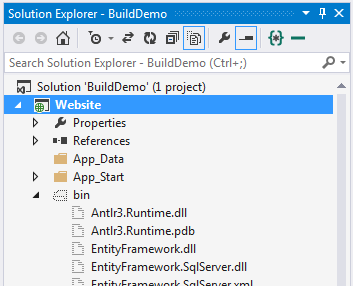
Select the project and refresh its contents. You should see that the bin folder has been filled with the compiled output.
Likewise, if you navigate to the staging folder you should see the compiled output has been copied to the Debug folder.
Finally, if you open a project view, you should see that syntax highlighting and Intellisense have been restored.
Wrapping Up
So there it is. We’ve managed to keep the staging directory as well as the Intellisense support for the application views.